


This article was previously published in Canadian Teacher Magazine’s May/June 2013 issue.
Painting with Blue and Yellow
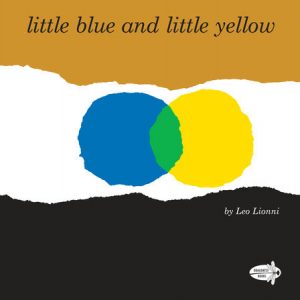 Picture books are an excellent way to inspire students’ art making. Using Leo Lionni’s little blue and little yellow as a jumping off point, students will explore basic colour mixing while expressing their creativity and practising their painting skills.
Materials
- 1 copy of little blue and little yellow by Leo Lionni
- yellow and blue tempera paint
- palettes to hold paint
- 12”x18” paper
- 8”x10” paper
- water containers
- paper towel for dabbing
- a variety of shaped and sized paint brushes
- easels (or have students stand while painting for greater mobility if table height allows)
- smocks or old T-shirts
Vocabulary
paint, brush, colours, mix, blend, spread, thick, thin, watery, wash, brush stroke (long, short, straight, curved, wavy, wiggly, dot, dab, thick thin, curved, twirl, zig zag), overlap, layer, line, shape (circle, square, oval, rectangle, diamond, triangle)
Learning Objectives
- Students will understand that paint is a liquid colour which can mix, spread and paint over other colours.
- Students will learn that any mark can be made with paintbrushes and that when brushstrokes intersect they make shapes.
- They also will learn that any colour can be created with paint and that paint changes colour when one colour is added to another.
- Students will be able to hold, clean and use a brush in a variety of ways.
- They will apply new knowledge of basic colour mixing to create a painting that demonstrates experimentation with a variety of lines and shapes.
Prepare for the Activity
- Purchase or gather the materials listed above.
- Cover tables with newspaper and set up materials.
- Begin by reading Leo Lionni’s little blue and little yellow aloud. Then lead a discussion with students about mixing primary colours. Ask open-ended questions like “What happened when yellow and blue touched each other?” and “Where do you see this colour in the room?” Explain to students that today they will be using two of the three primary colours— yellow and blue—to create their own paintings.
- Hand out paintbrushes to students and show them how to hold a paintbrush properly.
- Demonstrate how to mix a variety of tones of green (a blue green, a yellowy green, etc.).
- Show students how to paint a variety of lines. Ask students: “What kind of line would I get if I dabbed, pressed, dragged, wiggled, or twirled my paintbrush?”
- Demonstrate how to paint a variety of shapes, showing students how the colours change as the shapes touch and overlap.
- Show students how to wash their brushes and keep colours clean by rinsing the brush between colours and dabbing on a paper towel.
- Discuss the choice of whether to make a design or a painting of something students have seen or imagined.
Lead Small Groups
- Gather three or four students at each table.
- Invite students to first practise mixing a variety of tones of green and explore the marks that can be made with the brush on 8” x 10” paper. Students can mix colours on their palettes or directly on their papers.
- After some experimentation with colour mixing and paint application, give each student a piece of 12” x 18” paper and have them create their paintings.
- Have students make a variety of thicknesses of lines and sizes of shapes, encouraging the invention of new brush strokes.
- Encourage students to practise using the very tips of their brushes to create details.
- Leave completed paintings out to dry.
Tips and Hints for Responding to Individuals
- Help students with painting as needed.
- Show students how to hold their brushes upright and encourage them to practise painting with just the tips of their brushes on their palms first or with their brushes in the air, encouraging whole arm gestures.
- Demonstrate what to do when the brush stops picking up colour. You can explain that the brush is thirsty and needs another drink of paint.
- Remind students how to keep their brushes clean between colours. Offer specific steps for washing brushes to help students know what to do make a song or rhyme to help them remember. For example, touch the brush to the bottom of a water container: “one, two, three, four, turn your brush and wash some more. Five, six, seven eight, now you’re ready again to paint,” or “wipe, wipe, wipe” (on the edge of the container), “dot, dot, dot” (touching the brush to a paper towel to test cleanliness).
- Have students stand for greater mobility and consider playing music while they paint in order to stimulate their imaginations, focus their attention and provoke their movements.
- Show students examples of paintings created by artists from various countries and cultures for inspiration.
Follow Up
- Display students’ artwork and invite them to describe their paintings and what they did to create them. Discuss colour, scale, line quality, shape and detail in a few of the paintings. Ask students questions such as “How do you make green?” “What are some ways that we can apply paint?” “Tell us about your painting.” “Show us what you did with the brush to create that line.”
- Have students title their artwork. If a student’s painting tells a story, write it down and display the story with the painting for other students to look at and discuss.
Extensions
Building on the colour mixing skills students learned during this lesson, have them experiment with:
- Painting using all three primary colours.
- Adding a third color to a secondary colour.
- Adding black or white to colours to create tints and shades.
- Cutting up a painting to create a painted paper collage.
- Adding different materials such as oil, flour, sand, soap, salt, etc. to tempera paint to create changes in texture, thickness and opacity.
- Applying paint with tools such as feathers, sticks, sponge brushes, yarn, hand brooms, q-tips, etc.
ABOUT THE AUTHOR
Agnieszka Chalas
Agnieszka Chalas is currently the Manager of Community Engagement at ArtsSmarts. She holds an MA in Art Education from Concordia University, a BEd from the University of British Columbia, and a BFA from NSCAD University. She has a broad base of experience in art education has published curriculum, resource materials and articles on topics related to the teaching of art.
This article is from Canadian Teacher Magazine’s Spring 2020 issue.